DIY shoe rack – more than just a storage solution, it’s a chance to unleash your creativity and build a functional piece that reflects your style. Tired of shoe clutter? Imagine a custom-made rack that not only keeps your footwear organized but also adds a touch of personality to your space.
From simple designs to more intricate creations, building a DIY shoe rack opens a world of possibilities. This guide will walk you through the steps, materials, and inspiration you need to transform your shoe chaos into a stylish and efficient storage system. Whether you’re a seasoned DIYer or just starting out, we’ll equip you with the knowledge and confidence to tackle this rewarding project.
DIY Shoe Racks: A Practical and Stylish Solution
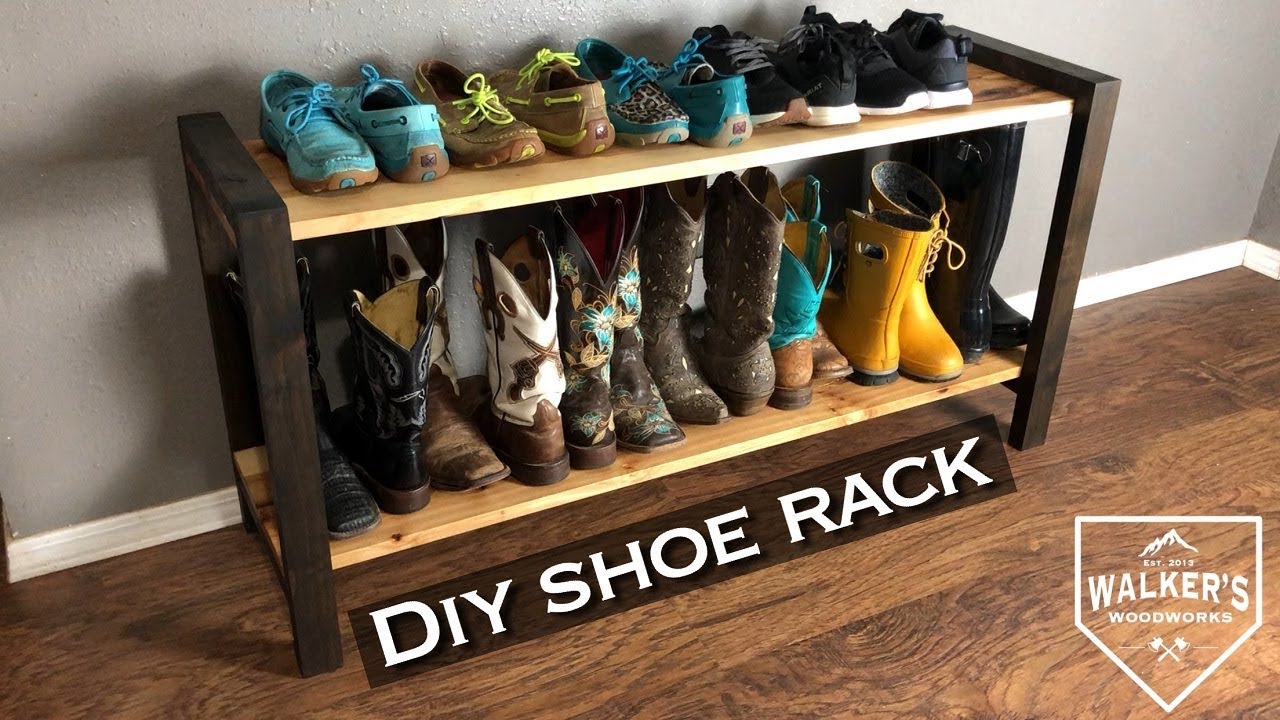
A DIY shoe rack is a great way to organize your footwear and keep your entryway tidy. Building your own shoe rack can be a fun and rewarding project, allowing you to customize it to fit your needs and style.
Benefits of Building a DIY Shoe Rack
Building a DIY shoe rack offers several advantages over purchasing a pre-made option.
- Cost-Effectiveness: DIY projects often cost less than buying a pre-made shoe rack, especially if you utilize recycled or salvaged materials.
- Customization: You can tailor the design, size, and style of your shoe rack to perfectly fit your space and preferences. This includes choosing the materials, colors, and finishes to match your existing décor.
- Personal Satisfaction: Completing a DIY project can be immensely satisfying, giving you a sense of accomplishment and pride in your handiwork.
Types of DIY Shoe Racks
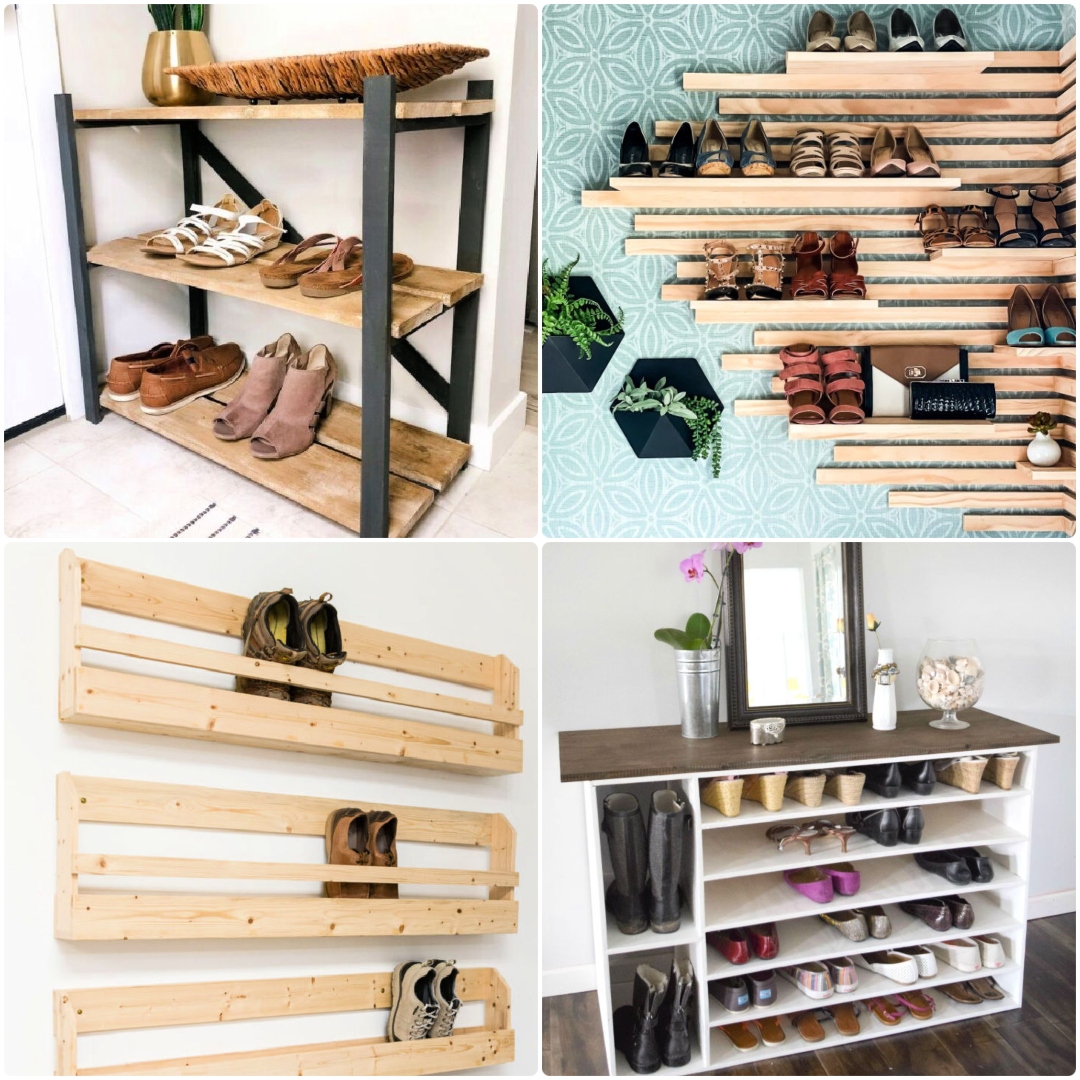
There are numerous DIY shoe rack designs to choose from, each with its own advantages and drawbacks.
- Simple Shelf Racks: These are basic racks made from wood or metal shelves supported by brackets. They are easy to build and offer a straightforward storage solution.
- Tiered Racks: Tiered racks are ideal for maximizing vertical space, offering multiple levels for storing shoes. These can be built from wood, metal, or even PVC pipes.
- Hanging Racks: Hanging shoe racks are space-saving options that can be mounted on walls or doors. They are often made from fabric, wire, or plastic and are ideal for smaller spaces.
- DIY Shoe Cabinets: More elaborate DIY shoe racks can include enclosed cabinets with doors, offering a more organized and dust-free storage solution. These are often made from wood or plywood and require more advanced woodworking skills.
Basic DIY Shoe Rack Designs
A simple shoe rack can be a practical and stylish addition to any home. It can help you organize your shoes and keep them off the floor, creating a more tidy and organized space.
Basic Structure
A simple shoe rack typically consists of a base and a series of shelves. The base can be made of wood, metal, or plastic, and it provides stability for the rack. The shelves can be made of wood, metal, or wire, and they are designed to hold your shoes.
Different Shoe Rack Designs
There are many different shoe rack designs available, each with its own unique features and benefits. Here are a few examples:
| Design Name | Description | Materials | Image Description |
|---|---|---|---|
| Stacked Shelves | This design consists of multiple shelves stacked on top of each other, creating a vertical storage solution. | Wood, metal, or plastic | The image shows a stacked shoe rack made of wood with three shelves. Each shelf is wide enough to hold multiple pairs of shoes. The rack has a simple, minimalist design and is finished in a natural wood stain. |
| Tiered Shelves | This design features shelves that are angled or tiered, allowing for more efficient use of space. | Wood, metal, or plastic | The image shows a tiered shoe rack made of metal with four shelves. The shelves are angled, creating a cascade effect that allows for more shoes to be stored in a smaller footprint. The rack has a sleek, modern design and is finished in a black powder coat. |
| Wall-Mounted Shoe Rack | This design is mounted to the wall, saving floor space. | Wood, metal, or plastic | The image shows a wall-mounted shoe rack made of wood with three shelves. The shelves are mounted to the wall using brackets, and the rack has a simple, rustic design. The wood is stained in a dark brown color. |
| Over-the-Door Shoe Rack | This design hangs over the door, providing a convenient and space-saving solution. | Metal or plastic | The image shows an over-the-door shoe rack made of metal with multiple compartments. The rack hangs over the door using hooks, and it has a sleek, modern design. The metal is finished in a silver color. |
Considerations for Choosing a Design, Diy shoe rack
When choosing a shoe rack design, it’s important to consider the following factors:
* Space available: How much space do you have for a shoe rack?
* Number of shoes: How many pairs of shoes do you need to store?
* Style: What style of shoe rack complements your home decor?
* Budget: How much are you willing to spend on a shoe rack?
Step-by-Step Instructions

Building a DIY shoe rack is a fun and rewarding project that can add a touch of organization and style to your home. This section provides detailed instructions for creating a basic shoe rack, along with helpful tips for ensuring its stability and durability.
Gathering Materials and Tools
Before you start building, it is important to gather all the necessary materials and tools. This will help you avoid delays and ensure a smooth building process.
- Wood: Choose a sturdy wood like pine, plywood, or MDF for the shelves and supports.
- Screws: Use screws that are long enough to securely fasten the pieces together.
- Wood glue: This will help to strengthen the joints and prevent the wood from splitting.
- Sandpaper: Smooth out any rough edges and prepare the wood for painting or staining.
- Paint or stain: Choose a finish that complements your décor.
- Measuring tape: For accurate measurements of the wood pieces.
- Saw: A circular saw or jigsaw can be used to cut the wood to size.
- Drill: For creating pilot holes before driving in screws.
- Screwdriver: To secure the pieces together.
- Level: Ensure the shelves are straight and even.
- Clamps: To hold the pieces together while the glue dries.
Cutting the Wood
Now that you have gathered all the necessary materials and tools, you can begin cutting the wood to size.
- Determine the Dimensions: Measure the space where you want to place the shoe rack and decide on the desired height, width, and depth.
- Cut the Shelves: Cut the wood for the shelves to the desired width and depth. You will need one shelf for each level of the shoe rack.
- Cut the Supports: Cut the wood for the supports to the desired height. You will need two supports for each shelf, one on each side.
- Cut the Base: Cut a piece of wood to the same width as the shelves to serve as the base of the shoe rack.
Assembling the Shoe Rack
Once you have cut all the wood pieces, you can start assembling the shoe rack.
- Attach the Supports: Attach the supports to the base using wood glue and screws. Make sure the supports are evenly spaced and parallel to each other.
- Add the Shelves: Place the shelves on top of the supports and secure them using wood glue and screws. Make sure the shelves are level and flush with the supports.
- Finish the Shoe Rack: Sand the shoe rack to smooth out any rough edges and prepare it for painting or staining. Apply your chosen finish and allow it to dry completely.
Tips for Stability and Durability
To ensure the stability and durability of your DIY shoe rack, consider these tips:
Use strong wood: Opt for hardwoods like oak or maple for added strength and durability.
Secure joints: Use wood glue and screws to reinforce the joints and prevent them from loosening over time.
Reinforce with brackets: Add metal brackets to the back of the shelves for extra support, especially if the shelves are long.
Balance the weight: Distribute the weight evenly across the shelves to prevent sagging.
Finish with a protective layer: Apply a sealant or varnish to protect the wood from scratches, moisture, and wear and tear.
Advanced DIY Shoe Rack Projects

For those seeking more intricate and personalized shoe storage solutions, advanced DIY shoe rack projects offer a rewarding challenge. These designs often incorporate unique features, materials, and construction techniques, allowing you to create a truly custom and stylish storage solution.
Examples of Complex DIY Shoe Rack Designs
Advanced DIY shoe rack designs can incorporate various features to enhance functionality and aesthetics. Here are some examples of such projects:
| Design Name | Description | Materials | Image Description |
|---|---|---|---|
| Floating Shoe Rack | This design creates a sleek and minimalist look by mounting shelves directly to the wall, giving the illusion that shoes are floating. | Wood, brackets, screws, paint | The image depicts a white floating shoe rack mounted on a light-colored wall. The shelves are arranged horizontally, with each shelf holding multiple pairs of shoes. The design creates a clean and modern aesthetic, maximizing space by eliminating the need for a base or legs. |
| Shoe Cabinet with Hidden Storage | This design combines a traditional shoe cabinet with a hidden compartment for storing items like cleaning supplies or other accessories. | Wood, hinges, drawer slides, paint | The image showcases a wooden shoe cabinet with a hinged door. The door reveals a series of shelves for shoes, while a hidden compartment underneath is accessed through a separate drawer. This design provides ample storage while keeping items organized and out of sight. |
| Shoe Rack with Built-in Seating | This design incorporates a bench or seat into the shoe rack, offering a convenient spot to put on or take off shoes. | Wood, cushions, screws, paint | The image depicts a wooden shoe rack with a built-in bench. The bench is positioned beneath the shoe shelves, providing a comfortable seating area for putting on or taking off shoes. The design is practical and stylish, offering both storage and seating functionality. |
| Shoe Rack with Sliding Doors | This design features sliding doors to conceal the shoes, adding a touch of elegance and minimizing dust accumulation. | Wood, sliding door hardware, paint | The image showcases a wooden shoe rack with sliding doors. The doors are constructed from wood panels that slide along a track, concealing the shoe shelves. This design adds a sleek and modern aesthetic while protecting the shoes from dust and clutter. |
Challenges and Considerations for Building Advanced Shoe Racks
Building advanced DIY shoe racks requires careful planning and execution. Here are some key challenges and considerations:
- Design Complexity: More intricate designs may involve complex cuts, joinery, and hardware installation, requiring advanced woodworking skills.
- Material Selection: Choosing the right materials is crucial for both aesthetics and durability. Consider factors like weight, moisture resistance, and ease of working with the material.
- Structural Integrity: Ensuring the shoe rack is structurally sound is essential, especially for larger or heavier designs. Proper support and reinforcement are critical.
- Space Constraints: The available space and dimensions of the shoe rack need to be carefully considered to ensure a proper fit and functionality.
- Budget and Time: Advanced projects may require a higher budget and more time commitment compared to simpler designs.
Storage and Organization
A well-organized shoe rack not only keeps your footwear neat and accessible but also extends its lifespan. Proper storage protects shoes from damage, dust, and moisture, ensuring they remain in good condition for longer.
Shoe Organization Tips
A few simple tips can maximize the storage capacity of your DIY shoe rack and make it easier to find the right pair.
- Categorize by Occasion: Group shoes based on their intended use, such as casual, formal, athletic, or seasonal footwear. This makes it easier to locate the right pair quickly.
- Utilize Vertical Space: Maximize vertical space by stacking shoes on top of each other, using shelves, or hanging shoe organizers. This is particularly helpful for smaller spaces.
- Implement Shoe Boxes: Use clear plastic shoe boxes for storing delicate or infrequently used shoes. Labeling the boxes with the type of shoe or occasion makes finding them a breeze.
- Rotate Your Shoes: Regularly rotate your shoes to allow them to air out and prevent moisture buildup. This helps maintain their shape and extend their lifespan.
Storage Solutions for Different Shoe Types
The type of shoe determines the best storage method.
- Sneakers: Sneakers can be stored upright on shelves, in shoe boxes, or hung using a sneaker organizer.
- Boots: Boots require vertical storage to maintain their shape. Boot racks, shelves, or hanging organizers are ideal for this purpose.
- Sandals and Flats: These shoes can be stored on shelves, in boxes, or even hung using a simple clothes hanger.
- Heels: High heels should be stored upright to prevent damage to the heel. Shoe boxes or dedicated heel organizers are good options.
Maintaining a Clean and Organized Shoe Storage System
A clean and organized shoe storage system not only enhances the look of your space but also helps prevent the spread of germs and odors.
- Regular Cleaning: Wipe down shelves and shoe boxes regularly with a damp cloth to remove dust and dirt.
- Shoe Deodorizers: Use shoe deodorizers or baking soda to absorb odors and keep your shoes smelling fresh.
- Shoe Care Products: Use shoe polish or leather conditioner to maintain the appearance and lifespan of your shoes.
Cost-Effective Solutions: Diy Shoe Rack
Building a DIY shoe rack can be a budget-friendly alternative to buying a pre-made one. By utilizing cost-effective materials and techniques, you can create a stylish and functional shoe storage solution without breaking the bank.
Utilizing Budget-Friendly Materials
Choosing affordable materials is key to creating a cost-effective DIY shoe rack. Here are some suggestions:
- Plywood: Plywood is a versatile and inexpensive material that is perfect for building shoe racks. It is readily available at most hardware stores and comes in various thicknesses and sizes.
- Pinewood: Pinewood is another affordable option that is lightweight and easy to work with. It is often used for shelves and supports due to its affordability and availability.
- Reclaimed Wood: Using reclaimed wood, such as pallets or old furniture, can be a great way to save money and create a unique shoe rack. These materials are often available for free or at a very low cost.
Repurposing and Recycling
Repurposing and recycling materials can significantly reduce the cost of building a DIY shoe rack. Consider the following ideas:
- Old Ladders: An old ladder can be transformed into a stylish and functional shoe rack by adding shelves or simply using the rungs for storage.
- Wine Crates: Wine crates can be stacked or arranged horizontally to create a unique and rustic shoe rack. They are readily available at liquor stores or online.
- PVC Pipes: PVC pipes can be cut and assembled to create a simple and inexpensive shoe rack. This is a great option for those looking for a modern and minimalist design.
Cost Savings Compared to Pre-Made Shoe Racks
Building a DIY shoe rack can save you a significant amount of money compared to purchasing a pre-made one. Here are some factors to consider:
- Material Costs: The cost of materials for a DIY shoe rack is often significantly lower than the price of a pre-made rack, especially when using reclaimed or recycled materials.
- Labor Costs: Building your own shoe rack eliminates the labor costs associated with manufacturing and shipping a pre-made rack.
- Customization: DIY shoe racks allow you to customize the design and size to perfectly fit your needs and space. This can save you money by avoiding the need to buy a pre-made rack that may not be ideal.
Conclusion
Building a DIY shoe rack offers numerous advantages, making it a worthwhile endeavor for anyone seeking a practical and stylish storage solution. From the satisfaction of creating something with your own hands to the potential cost savings, the benefits of a DIY shoe rack are undeniable.
Benefits of Building a DIY Shoe Rack
The benefits of building a DIY shoe rack are multifaceted.
- Cost-effectiveness: Building your own shoe rack can save you a significant amount of money compared to purchasing a pre-made one. You can use readily available materials and often find deals on lumber or recycled materials.
- Customization: A DIY shoe rack allows you to tailor the design, size, and style to perfectly suit your needs and preferences. You can choose the desired dimensions, the number of shelves, and the materials to match your existing decor.
- Sense of accomplishment: Building a DIY shoe rack provides a sense of accomplishment and pride in creating something functional and aesthetically pleasing. It can be a rewarding experience, especially for those who enjoy hands-on projects.
- Environmental friendliness: Upcycling or repurposing materials can reduce waste and contribute to a more sustainable approach to home organization.
Ending Remarks
Building a DIY shoe rack isn’t just about saving money; it’s about crafting a piece that reflects your unique taste and needs. You can customize every aspect, from the materials and design to the final finishing touches. So, unleash your inner artist, gather your tools, and embark on a journey to create a shoe rack that’s both practical and a statement piece in your home.
